
How to Take Good Pictures on Your Phone: A Guide for Restaurant Owners
Taking great pictures with your phone comes down to three things: good natural light, smart angles, and thoughtful staging. You don't need a professional DSLR camera. The phone in your pocket is more than capable of capturing images that make customers' mouths water, especially once you learn a few key tricks.
Your Phone Is Your Most Powerful Photo Tool
As a restaurant owner, you pour your heart and soul into the food you create. It's frustrating when your photos just don't capture how great your dishes really are. Professional photography seems like the answer, but it's often a logistical challenge. Finding a good photographer takes time, and the costs add up quickly.
Traditional food photography costs $75-150 per photo, and you often have to wait 2-7 days to see the results. That slow, expensive model doesn't work when you have a daily special to post or need an urgent menu update. You need a tool that's fast, affordable, and gives you control.
The Power Already in Your Pocket
The good news is you already have that tool. Modern smartphone cameras are incredibly sophisticated, which is why they've become the primary way people capture images. The technology is there; you just need to learn how to apply it to your food. You can explore more about mobile photography trends to see just how advanced these devices have become.
Your phone lets you snap a photo of a dish the second it leaves the kitchen, when it's looking its absolute best. No more scheduling photoshoots weeks in advance. With a few simple techniques, you can learn how to take good pictures on your phone that reflect the quality and passion you put on the plate.
The goal isn't to become a professional photographer overnight. It's about learning practical skills to create great-looking menu photos whenever you need them, without breaking the budget or losing valuable time.
This guide is designed for busy restaurant owners like you. We'll walk through the practical steps to turn a simple snapshot into a delicious photo that gets customers excited to order.
Staging Your Dishes for Irresistible Photos
Before you tap the shutter button, the real work begins with staging. How you set the scene is what separates a forgettable phone picture from a photo that makes people need to try your food. It’s all about telling a story with your dish as the hero.
You don't need a professional studio or expensive gear. The trick is to create a vibe that feels true to your restaurant. Are you rustic and hearty? Or are you clean and modern? A little thought here pays off when your food is ready for its close-up.
Building Your Background
The surface your dish sits on is the foundation of your photo: it sets the entire mood. The best backgrounds are usually simple and have some texture, but they never steal the spotlight from your dish.
Here are a few low-cost ideas that almost always work:
- Rustic Wood Planks: Perfect for burgers, BBQ, and breakfast plates. A reclaimed board or a hefty cutting board does the trick.
- Clean Linens: A simple white or neutral-colored linen tablecloth or napkin adds instant class. This is great for delicate pastries or upscale entrees.
- Natural Stone Tiles: A single tile of slate, marble, or granite from a hardware store can give you a sophisticated, clean look for just a few dollars.
- Butcher Paper: For a casual, deli-style vibe, brown or white butcher paper is cheap, easy, and looks fantastic.
The main thing is to pick a background that adds texture and context without being a distraction. It's there to support the dish, not compete with it. If you're struggling to find the right physical surfaces, a food background generator can help you digitally swap out backgrounds until you find the perfect one.
Choosing Props with Purpose
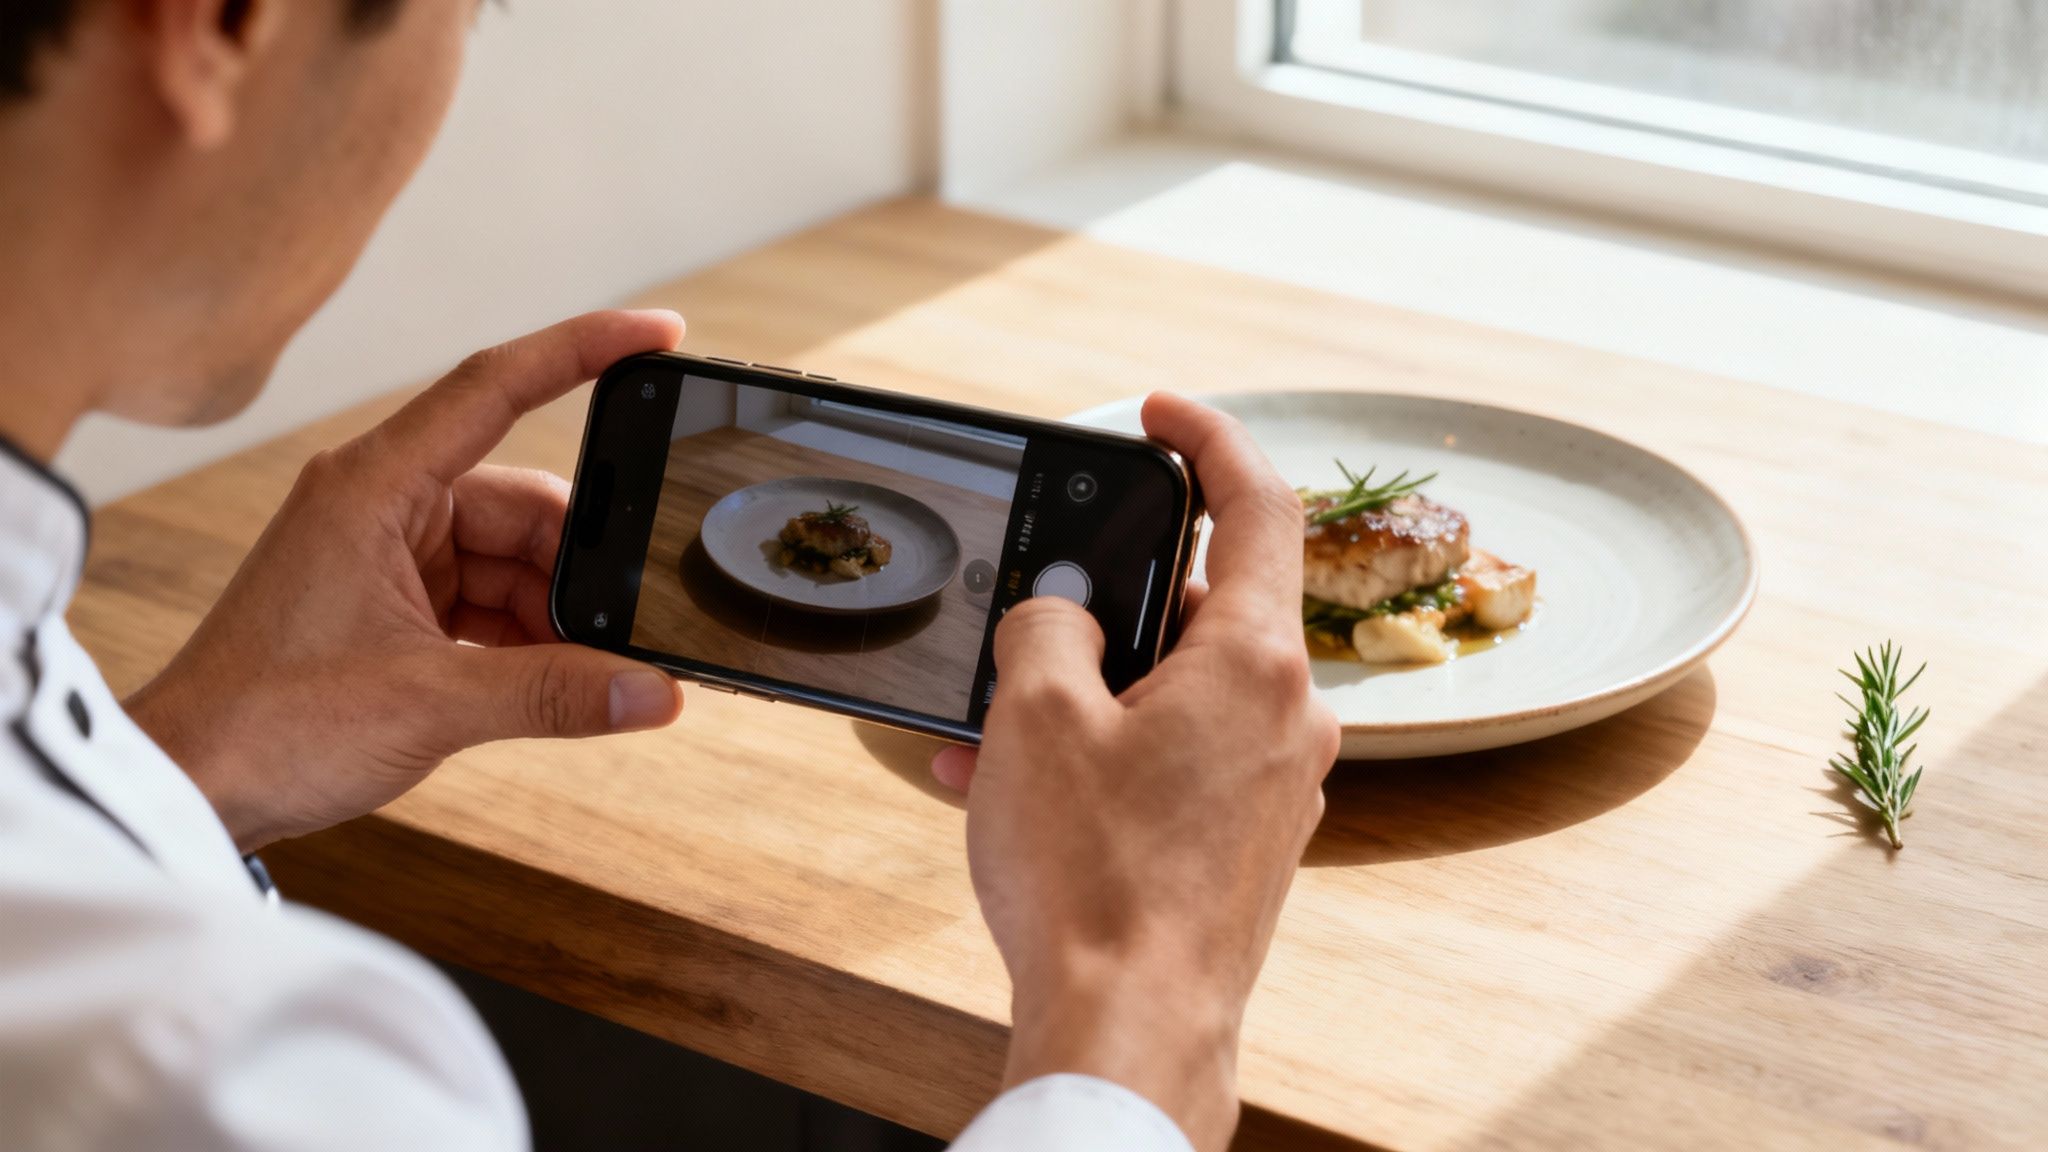
Props should add context, not chaos. The best ones are usually things you'd find in the dish anyway or items a customer would actually use. They help tell the story of where the food comes from and how it tastes.
A sprig of fresh rosemary next to a lamb chop, for example, hints at the dish's flavor. For pasta, a small bowl of parmesan and a few basil leaves add color and authenticity. You're trying to make the scene feel real and inviting.
Remember, every single item in the frame needs a reason to be there. If a prop doesn't add to the story or make the dish look better, leave it out. Simplicity almost always beats clutter.
Picking the right props is a skill that can turn a good photo into a great one. To dive deeper, check out this guide on how to choose props that enhance your visual story.
Arranging the Scene
You’ve got your background and props. Now it's time to put it all together. This is where you get to show off the care you put into your food. Don't just plop the dish in the middle of the frame.
Try these simple composition tricks:
- Place the main dish slightly off-center. It feels more dynamic and interesting.
- Use your props to guide the viewer’s eye. A fork or knife can act as a "leading line" pointing right to the main event.
- Garnish with intention. A final sprinkle of fresh herbs, a deliberate drizzle of sauce, or a twist of lemon can be the finishing touch that makes a dish look complete. For a burger, make sure the cheese is perfectly melted and the lettuce looks crisp. A swirl of cream in a bowl of soup adds visual magic.
Taking a few extra minutes to stage your photo makes all the difference. It shows customers you care about the small stuff, both in the kitchen and in how you present your passion.
Nailing the Shot: Light, Angles, and Your Phone's Camera
Alright, your dish is beautifully staged. Now comes the part that can feel daunting: actually taking the picture. But you don't need to be a pro photographer. A few simple tricks with light and angles will make a world of difference.
Forget what you've seen in studios with massive, expensive lights. Your best friend for food photos is the sun, and it's completely free.
Let Natural Light Do the Heavy Lifting
First rule of food photography: turn off your phone's flash. The built-in flash is the fastest way to ruin a great shot. It blasts your food with harsh, flat light that kills textures, creates ugly glares, and washes out the colors.
Instead, find a table near a window. You're not looking for direct, blinding sunbeams, which create harsh, distracting shadows. What you want is soft, indirect light.
If the sun is too intense, you can diffuse it. Hang a thin white curtain or tape a piece of parchment paper over the window. This simple move softens the light, giving you gentle shadows that create depth and make the food look its best. For a deeper dive, our complete guide on food photography lighting has you covered.
The infographic below nails the simple workflow. You set the scene first, then worry about the light.
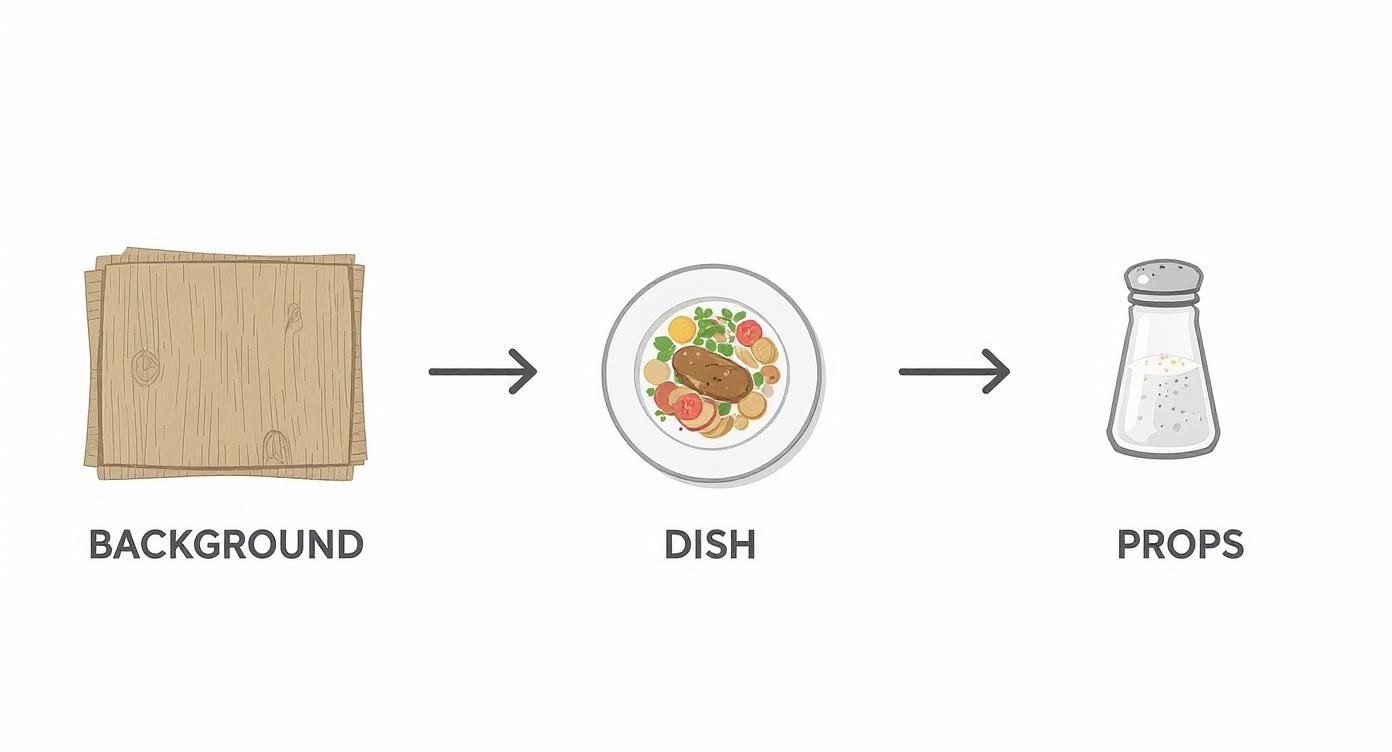
As you can see, getting the background, dish, and props right creates the foundation. Only then do you bring in the camera to capture it.
Find the Perfect Angle for Each Dish
The angle you shoot from can make or break the photo. A burger and a pizza need to be shot differently to look their best. Your job is to find the angle that highlights what makes each dish special.
There are really only three angles you need to know:
- Overhead (Top-Down): This is your go-to for flat dishes with great patterns like pizzas, colorful salads, or charcuterie boards. It creates a clean, graphic feel.
- 45-Degree Angle: This is the classic for a reason. It's how we naturally see food when we're sitting down to eat. It works for almost everything, especially dishes with height like a juicy burger, a stack of pancakes, or a slice of cake.
- Straight-On (Eye-Level): Get down low for this one. It's perfect for tall dishes where layers are the main event, like a triple-decker sandwich or a parfait. This angle screams "look at my height and all these layers!"
Expert Tip: Never just take one photo. Move around the plate. Shoot from a few different angles and heights. You'll quickly get a feel for what makes each dish truly shine.
A Few Clicks in Your Camera App for a Better Photo
Your phone's camera app has a couple of simple tools that give you a surprising amount of control. They're designed for quick adjustments.
First, always tap to focus. Before you snap the picture, tap your finger on the most important part of the dish, like the perfectly melted cheese on a burger or the sear on a steak. This tells your camera, "Hey, this is the star of the show. Make it sharp."
Next, adjust the exposure. Once you tap the screen, you'll probably see a little sun icon with a slider. Slide your finger up to make the photo brighter or down to make it darker. A small bump in brightness almost always makes food look fresher and more appealing. These two tweaks take seconds but have a massive impact.
Elevating Your Photos With AI Editing
You've staged the perfect shot and captured a solid photo of your dish. That’s a huge win. But to get that truly professional look, the image often needs a final polish. This is where editing comes in, and for a busy restaurant owner, AI is a practical solution.
The problem is, most AI photo tools don't work with your actual food. They generate generic images of "a burger," which does nothing to show off your unique creations. On the other hand, professional software like Photoshop demands hours of training and a pricey subscription.
We built MenuCapture to bridge that gap. It’s designed specifically to take the photos you just shot of your real dishes and give them a professional finish in 10-30 seconds. No technical skills needed; you just have to know what you want.
The Power of Simple Instructions
What really differentiates MenuCapture is its text prompt editing. Instead of fumbling with confusing sliders, you just type what you want to change. Think of it like having a professional photo editor on call.
This approach keeps your food looking authentic while adding that perfect final touch.
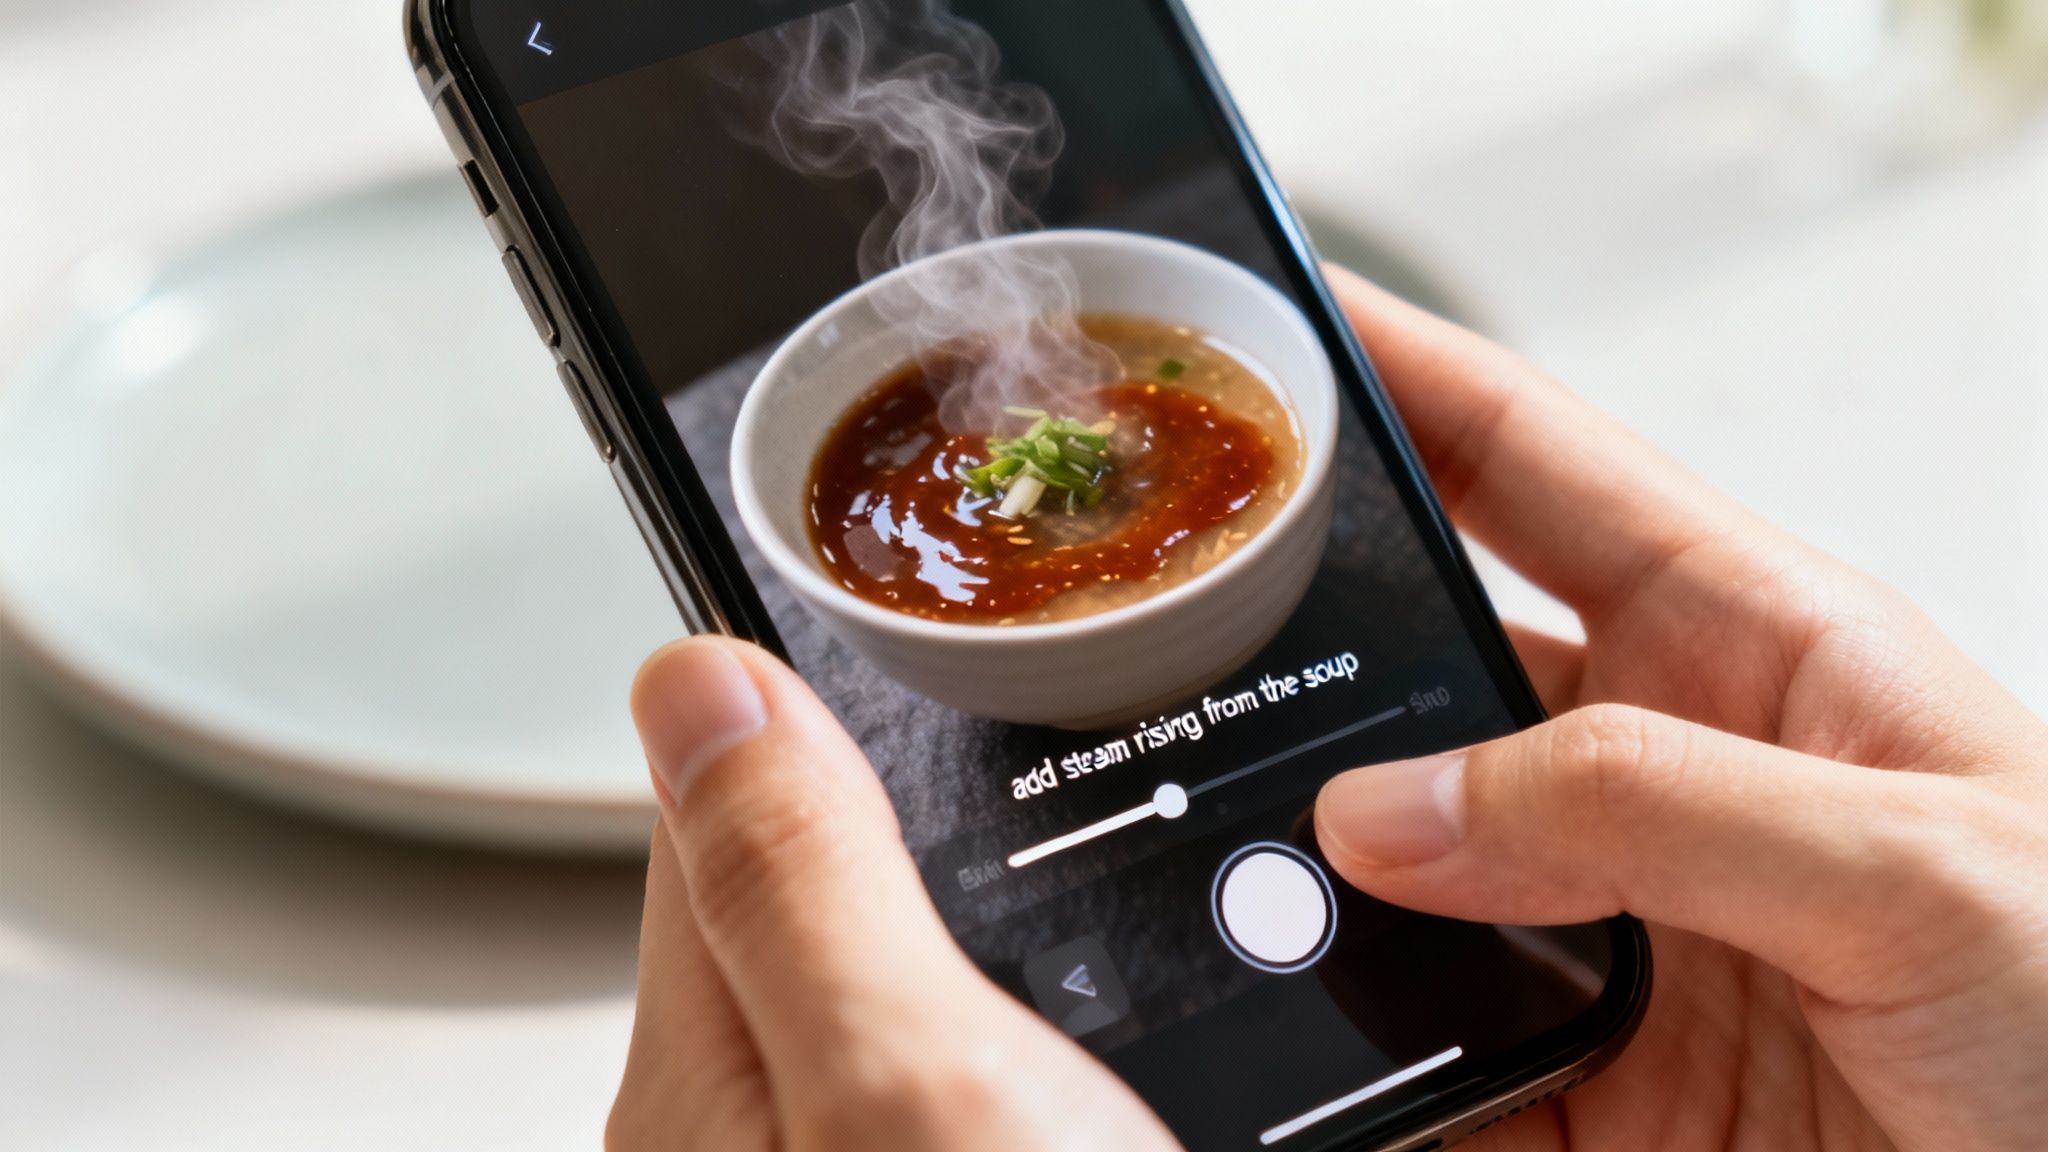
Here are a few real-world examples of what you can type:
- For a bowl of soup: "add steam rising from the soup" to make it look hot and fresh.
- For a pasta dish: "make sauce glossier" to give it a rich, appetizing sheen.
- For a steak entree: "add a sprinkle of fresh parsley on top" for a pop of color.
- For a burger: "add melted cheese on top" to dial up the crave factor.
It's all about making small, specific tweaks that elevate the photo you already took. You're in complete control. You can see more ways to do this in our guide on how restaurant owners edit menu photos with AI.
Restaurant owners deserve tools that work with their actual food photos. Most AI photo tools generate random food images. MenuCapture edits YOUR actual photos, preserving the heart and soul of your dishes.
Fine-Tuning Until It's Perfect
Getting a photo just right often takes a few tries. With a traditional photographer, re-shoots cost more money and time. With manual editing software, undoing changes can be a hassle. MenuCapture was built to encourage experimentation.
You can edit the same image multiple times. If the first edit isn't quite right, just type a new instruction. For example, after making the sauce glossy, you might also decide to "change lighting to warmer" to create a cozier feel.
The platform keeps a full version history with thumbnails for each image, so you can see every step of your editing process. If you want to go back, you can revert to a previous version or use familiar keyboard shortcuts like Ctrl+Z and Ctrl+Y to undo and redo.
Storing and Organizing Your Work
Once you start building a library of great photos, keeping them organized is key. You don't want to waste time digging through random folders every time you need an image.
MenuCapture has a built-in gallery that handles this for you. All your images—originals and every edited version—are stored in one place. The gallery automatically organizes your photos and uses smart grouping by date, making it easy to find what you're looking for. There's also a search function to quickly track down specific dishes.
To explore more ways to streamline your post-processing, you can check out various AI content creation tools that can help with more advanced editing and optimizing your phone pictures.
The Real-World Difference in Time and Cost
When you put it all together, the benefits are clear. You're not just saving a little money; you're changing how you create your restaurant's visual identity.
Let's look at a side-by-side comparison.
Traditional Photography vs. MenuCapture AI Processing
| Factor | Traditional Photography | MenuCapture AI Processing |
|---|---|---|
| Cost Per Photo | $75 - $150 | $0.24 (weekly) or $0.09 (annual) |
| Turnaround Time | 2-7 days | 10-30 seconds |
| Scheduling | Photographer scheduling required | No scheduling needed |
| Flexibility | Re-shoots cost extra | Edit multiple times included |
| Consistency | Results vary by photographer | Consistent AI results |
The numbers speak for themselves. You can save 99.9% on menu photo costs while getting results in seconds instead of days.
This means you can finally afford to have a professional-looking photo for every single item on your menu, every special, and every new creation.
Putting It All Together: A Cohesive Menu with Advanced Tools
Getting a single, great photo is one thing. But creating a whole menu where every image looks like it belongs together? That's the real mark of a pro. When customers see that consistency, it builds trust and makes your brand feel polished. The problem is, that kind of consistency usually requires a strict process and a big budget.
https://www.youtube.com/embed/ali-WbY89wA
This is where you can start working smarter. Instead of tweaking photos one by one, think about your menu's visual story as a whole. Tools with features like batch processing and smart organization aren't just conveniences; they’re what let you maintain a high standard without losing your entire day.
Cut Your Editing Time Down with Batch Processing
Let's say you just shot ten new dishes. The old way would mean editing each one individually. That’s a tedious process. With MenuCapture, you can use batch processing to upload and apply edits to up to 10 photos at once.
For example, if you want a warm, inviting glow across all your new winter specials, you can apply that single effect to all ten images in one go. A task that used to be a half-day project becomes something you can do in minutes.
Get Creative with Ingredient Swapping
Sometimes a dish is perfect, but you want to show off its versatility. Instead of cooking and shooting an entirely new plate, you can use text prompts to make major changes to existing photos.
Think about the possibilities:
- Have a best-selling lamb dish? Type "swap the lamb for duck" and instantly create an image for a new special.
- Want to feature a different topping on your pizza? Try "change the mozzarella to goat cheese."
- Need to highlight another seafood option? A simple instruction like "replace the salmon with tuna" gives you a brand-new photo.
This flexibility lets you expand your visual menu without spending extra time in the kitchen.
Keep Your Photos Organized—Automatically
The more photos you take, the harder they are to manage. MenuCapture gets rid of that headache with its built-in gallery system.
Every photo you upload and every version you create is automatically saved and organized. The system uses smart grouping by date, making it a breeze to find the shots from last Tuesday's session. Plus, a search function helps you find a specific dish without scrolling endlessly. It's all about spending less time hunting for files and more time running your restaurant.
Consistency across your menu photos doesn't just look good: it screams professionalism. When every image shares the same high quality, you're sending a powerful message that customers can expect that same standard in your food and service.
We live in a visual world. People share billions of images daily, and research shows food photos influence nearly two out of three people in their dining decisions. You can dig into the research on the dominance of digital photography to see just how central mobile images have become. For restaurants, that means your online menu is often the first impression you make.
An Affordable Way to Look Like a Pro
Let's talk about the bottom line. Hiring a professional photographer to build a visually consistent menu would set you back thousands of dollars.
MenuCapture gives you a much more practical way forward. At just $9/week or $159/year, you get access to powerful tools to create and maintain a beautiful, cohesive menu that does justice to the quality of your food.
Frequently Asked Questions
We get a lot of the same questions from restaurant owners trying to get their menu photos right. Here are some straight answers.
What Is the Best Lighting for Phone Food Photography?
Natural daylight is your secret weapon. It’s free, and it makes food look its best. Find a spot near a window that gives you soft, indirect light, not harsh, direct sunbeams. This gentle light wraps around the dish, creating soft shadows that give the food depth.
Steer clear of direct, blaring sunlight. It creates ugly glares and hard, dark shadows that hide the delicious details. And whatever you do, turn off your phone's built-in flash. It's the fastest way to make your food look flat, greasy, and unappealing.
Do I Really Need Special Equipment to Take Good Menu Photos?
Nope. You can get great results with the smartphone you already have. A small tripod can be nice for keeping things steady, but it's absolutely not a deal-breaker.
The things that make the biggest difference cost nothing:
- Finding good natural light: That window is your best friend.
- Simple staging: Using clean backgrounds and a few props to set the scene.
- Smart composition: Knowing which angles make your dish look best.
Focusing on these fundamentals will elevate your photos far more than any fancy lens ever could. Your phone is more than powerful enough.
Will AI-Edited Photos Look Fake or Unnatural?
That's a valid concern. It depends on the AI you're using. Many AI image generators create photos from scratch, and the results often look plastic or generic. They can't capture the unique details that make your food your food.
This is exactly why we built MenuCapture. It’s not about creating fake food. It’s about enhancing your actual photos. You snap a real picture of your dish, upload it, and give simple text instructions. The AI then works on your original image, making sure the final photo looks like a professionally retouched version of what came out of your kitchen.
So, when you type "add a sprinkle of parsley," the AI intelligently adds a realistic-looking garnish that fits the dish. It preserves the authenticity of your food, just making it look its best.
How Can I Make All My Menu Photos Look Consistent?
Consistency is key to a professional-looking menu. It makes everything feel cohesive and polished, and it all comes down to having a repeatable system.
When you're shooting, try to set up a dedicated "photo spot." Use the same background, shoot by the same window around the same time of day for similar light, and stick to a couple of go-to camera angles.
When it comes to editing, a tool like MenuCapture helps. You can apply the same style across a whole batch of photos with ease. For example, you can use batch processing to give a set of images the same warm lighting effect or place them all on a "rustic wood" background. This ensures every item on your menu looks like it belongs together.
Ready to see what your phone photos are truly capable of? With MenuCapture, you can transform them into professional menu images in seconds.
Ready to transform your menu photos?
Type what you want changed and AI processes your restaurant photos in seconds.
Start Processing Photos