
How to take professional food photos with your smartphone
You pour your heart and soul into creating the perfect dish. Let's be honest: getting photos that do it justice can feel like an impossible task. The good news is, learning how to take professional food photos doesn’t require a fancy camera. It's about nailing a few simple techniques with your smartphone and then using the right tools to add that final polish.
Your Food Deserves Photos That Sell
Running a restaurant means your time and money are always stretched thin. You know great photos are essential for your menu and marketing, but the typical options often feel like a dead end.
Hiring a professional food photographer gets expensive fast. You're looking at $75-150 per photo, and that's just the start. Then you have to deal with scheduling, staging, and waiting around—often 2-7 days—for the final images. For a business with daily specials and seasonal menus, that’s a constant, draining expense.
We get it. Your food is a direct reflection of your hard work, and your menu photos need to show that quality. After all, research shows food photos influence nearly two out of three people in their dining decisions. That makes them one of your most powerful sales tools. Trying to learn complicated editing software or waiting on a photographer just isn't practical when you're running a busy kitchen.
A Practical Approach for Restaurant Owners
There's a much smarter, more efficient way to handle this. This guide breaks it down into a simple, two-part strategy that puts you back in control:
- Capture a good source photo. We’ll walk through the essentials of taking a high-quality picture with the camera you already own: your smartphone.
- Use smart tools to perfect it. Then, we'll show you how to take that solid smartphone photo and transform it into a professional-grade image in seconds, ready for your menu or social media.
This approach is designed for the reality of restaurant life. You don’t need a photography studio, a design degree, or a massive budget. What you need are clear, actionable steps that deliver consistent, beautiful results without getting in the way of your actual job.
You pour your heart into every dish; your photos should reflect that same level of passion and quality. Great photos aren't a luxury; they're an essential part of telling your restaurant's story and showing customers the true value of your food.
By following along, you won’t just learn how to snap a picture. You'll learn how to create an image that makes people hungry and excited to order. It's all about closing the gap between the amazing food you serve and how it’s presented to the world online.
Setting the Stage for a Perfect Shot
Believe it or not, the most important work happens long before you even pick up your smartphone. A little bit of prep goes a long way in turning a simple dish into a photo that makes people hungry just by looking at it. Think of it as mise en place for your photoshoot: getting everything in order first is the secret to a smooth, successful session.
These foundational steps don’t cost a dime, but they are absolutely the difference between a forgettable snapshot and a professional-quality food photo.
Find Your Best Light
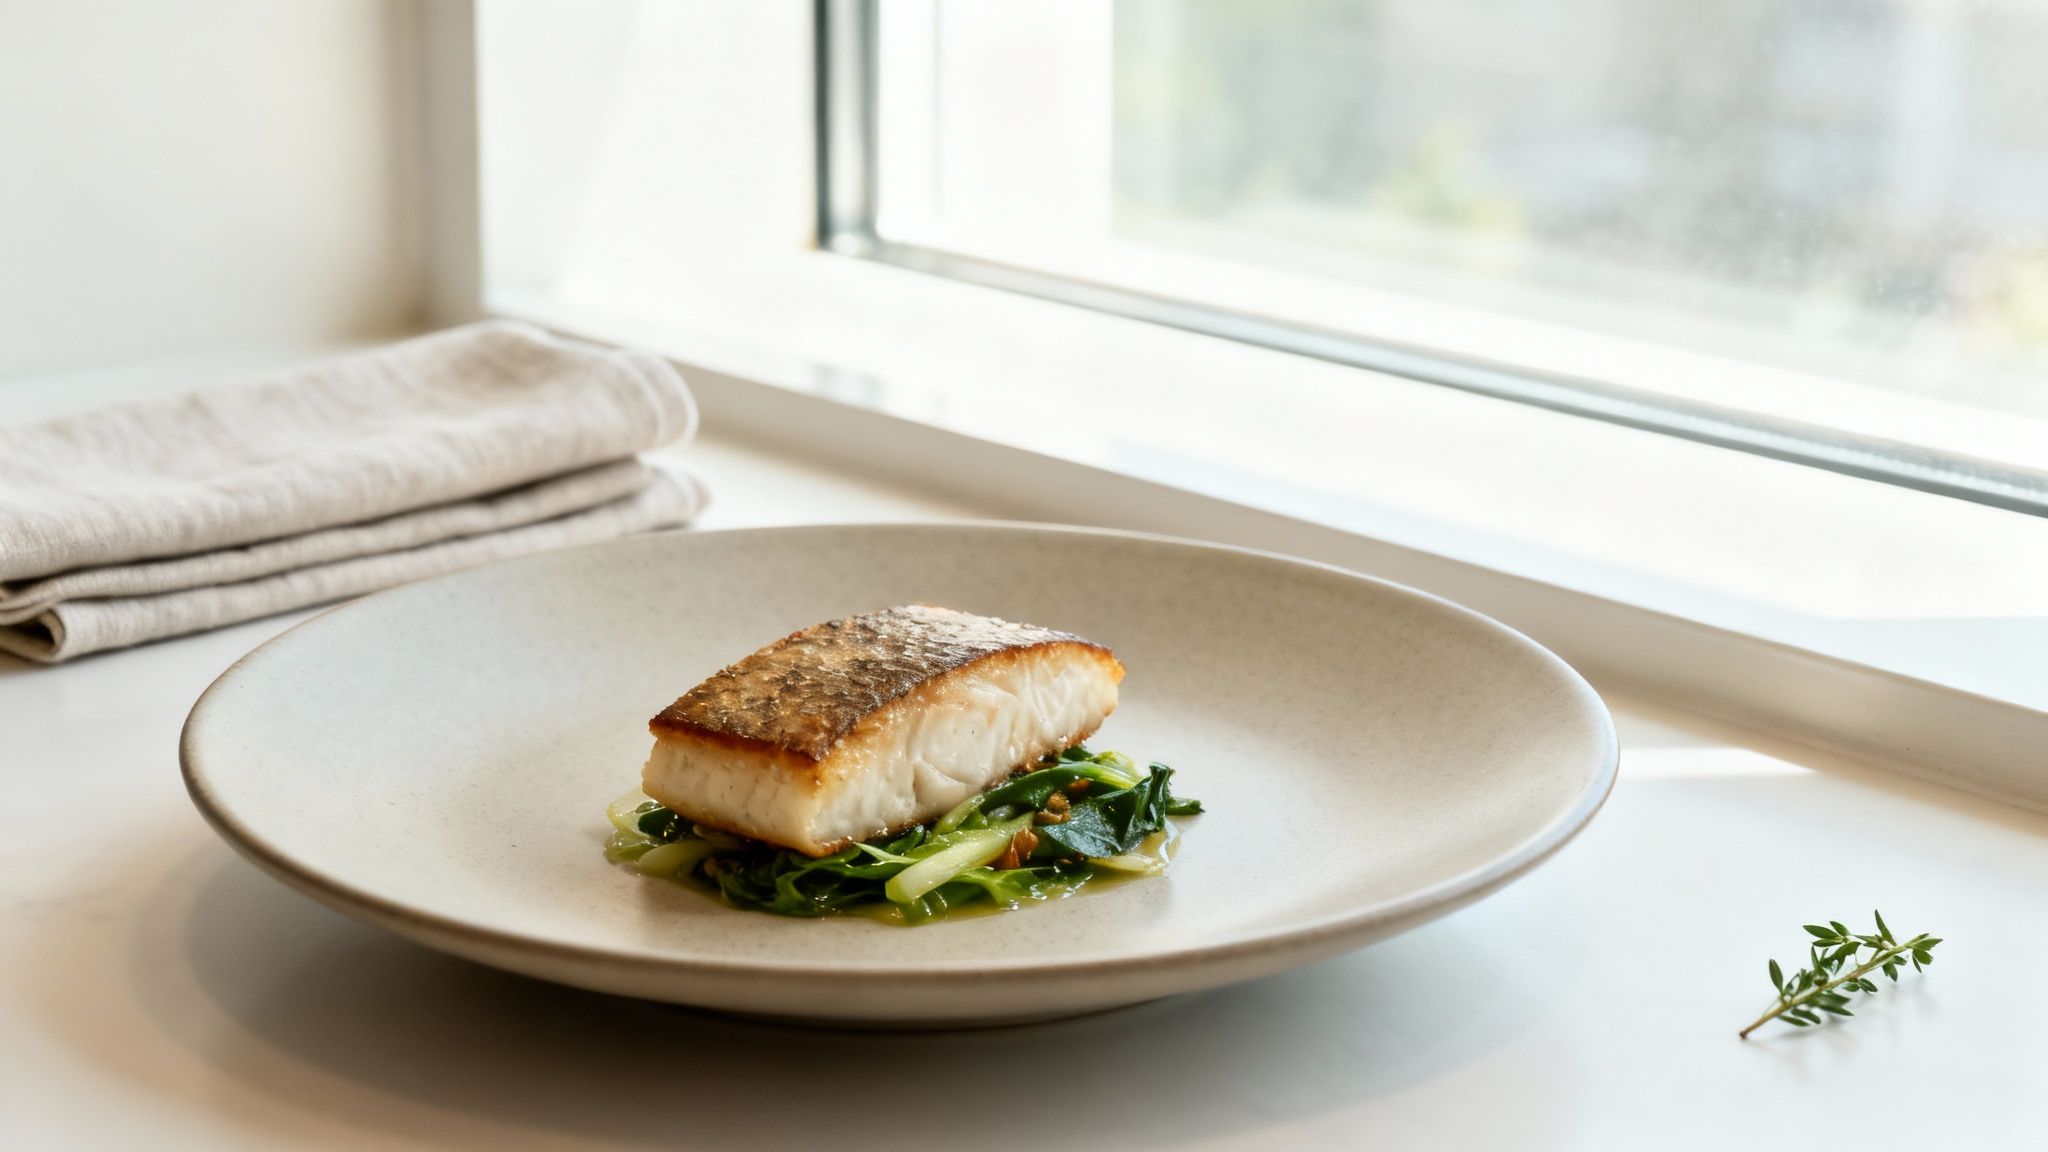
Let me be clear: light is everything in food photography. It's the single most important element. But don't worry, you don't need a fancy studio. Your restaurant already has the best light source you could ask for: a window.
What you're looking for is natural, indirect sunlight. This kind of light creates beautiful, soft shadows that give your food dimension and texture without any harsh, unflattering glare.
- Your Mission: An hour or two after you open, take a walk through your dining room. Find a table near a large window that gets plenty of bright light, but isn't getting hit by direct sun. That's your new photo spot.
- What to Avoid: Whatever you do, do not use your phone’s built-in flash. It's the fastest way to make a gorgeous dish look greasy, flat, and completely unappetizing. For a deeper look at controlling light, check out our guide on essential food photography lighting.
Style Your Plate and Scene
Styling isn't about making things look fake or complicated. It's about making the food the undeniable star of the show. Your goal is to build a scene that feels authentic and inviting, not cluttered or stiff.
Start with the dish itself. Plate it with care, making sure the main ingredients are clearly visible. Sometimes, a simple sprig of fresh parsley or a last-second sprinkle of chili flakes is all you need to add that pop of color and life.
I've noticed a real shift in professional food photography lately. The trend is moving away from overly perfect shots and towards authenticity. A few artful crumbs on the table or a subtle drip of sauce makes the food look real and delicious, not like a plastic model.
This move towards authentic styling works hand-in-hand with using natural lighting. The soft, diffused daylight makes everything look fresh and much more inviting.
Keep Props Simple
When you're setting the scene around the plate, remember this: less is always more. The food must remain the hero.
- Plates and Bowls: Stick with clean, neutral-colored plates. Whites, grays, and subtle earth tones work wonders because they don't compete with the food. A busy, patterned plate is a major distraction.
- Backgrounds: A clean wooden table, a simple piece of slate, or even some crumpled parchment paper can make for a beautiful, textured background. Keep it simple and make sure it fits your restaurant's vibe.
- Supporting Elements: A neatly folded linen napkin, a single fork, or a glass of water can add a bit of context and tell a story. Before you add anything, just ask yourself: "Does this help the shot, or is it just noise?" If it's not adding value, get it out of there.
By taking the time to set the stage properly, you’re doing 90% of the work before you even think about tapping the shutter button. This prep ensures your smartphone can capture the best possible image, which will make any final edits much easier.
Essential Smartphone Camera Techniques
Forget the fancy DSLR for a moment. The smartphone in your pocket is a powerful tool, and with a few simple tricks, you can capture dishes that look absolutely fantastic. It’s not about having the most expensive gear; it’s about knowing how to use what you’ve already got.
Let's start with angles, because how you position your phone can completely change the story your photo tells. For most dishes with some height—think a juicy burger or a decadent slice of cake—a 45-degree angle is your best friend. This angle feels familiar and inviting, almost exactly how a customer would see the plate as it's set down in front of them.
But what about flat dishes like a pizza, a sprawling charcuterie board, or a vibrant salad? That’s where the overhead shot, or "flat lay," comes in. Shooting from directly above highlights the beautiful arrangement, colors, and textures, giving the photo a clean, graphic, and modern feel.
Master Your Focus and Composition
Once you've found the perfect angle, you need to tell your camera's lens what the star of the show is. This part is surprisingly easy: just tap your finger on the main part of the dish on your screen. A little box or circle will pop up, confirming your focus point. This one simple action ensures the most important element is perfectly sharp, guiding the viewer's eye exactly where you want it to go.
Now for composition. This might sound intimidating, but a timeless guideline called the "rule of thirds" can instantly make your photos more compelling. Picture a tic-tac-toe grid overlaying your screen. Instead of placing your dish right in the dead center, try placing it where the lines intersect.
This small shift creates a more balanced and visually interesting image that just feels right. Most smartphones have a grid feature you can switch on in your camera settings to make this a breeze. And while you can get great results with just your phone, understanding what the pros use can be a game-changer. For a deeper dive, check out our guide on the best equipment for food photography.
This infographic breaks down a simple workflow for getting your shot just right, from lighting to props.

As you can see, getting the fundamentals of lighting, plating, and styling right is the foundation for any mouth-watering food photo.
Key Takeaway: You don't need a professional setup to take professional-looking photos. By mastering your angles, tapping to focus, and using the rule of thirds, you can elevate your smartphone food photography from good to great. These small adjustments make a world of difference in how customers perceive your menu.
Transforming Photos with AI Editing
You’ve snapped a great photo on your phone: that's a solid start. But the part that makes a dish look truly irresistible happens in the edit. In the past, this meant sinking countless hours into learning complicated software or hiring a professional for every single image. Neither is a good fit when you're running a business.
The truth is, traditional post-production has always been a major hurdle. It's expensive, it's slow, and it demands a specific technical skill set. Restaurant owners deserve tools that work with their actual food photos.
This is where AI processing completely changes the game. We built MenuCapture because most AI photo tools generate random food images. MenuCapture edits YOUR actual photos. This delivers professional, consistent results in a fraction of the time, without the steep learning curve or the hefty price tag.
Your Words Are the New Editing Tools
The primary feature that differentiates MenuCapture is text prompt editing. Once you upload your photo, you simply type what you want to change. No more fiddling with sliders for saturation or wrestling with layer masks. It's all about simple, direct instructions.
You could type things like:
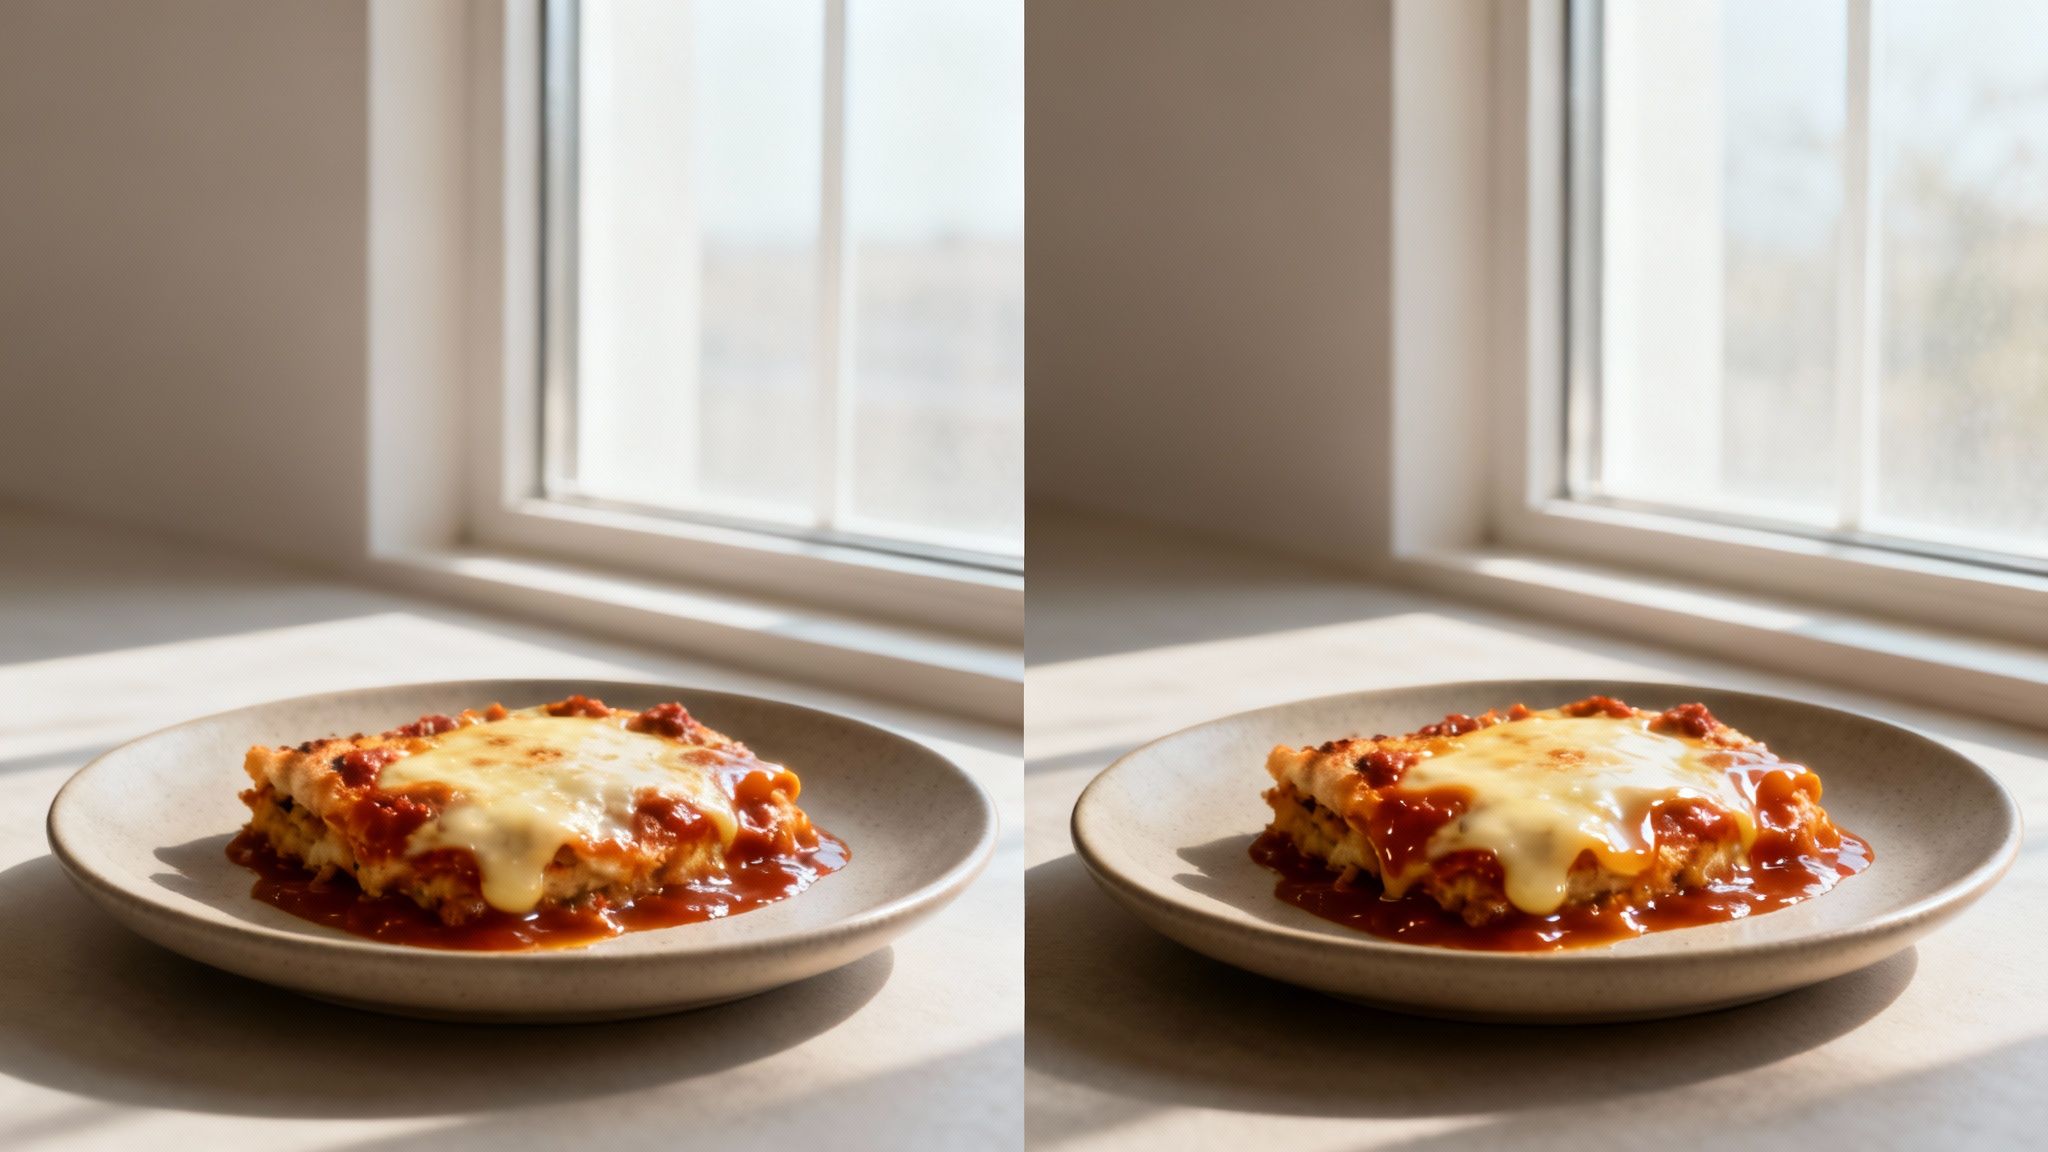
- "Add melted cheese on top."
- "Make sauce more glossy."
- "Change lighting to warmer."
You can even swap out key ingredients. Let’s say you have a perfect shot of your lamb special, but this week you're featuring duck. Just type, "Swap the lamb for duck," and the AI gets it done in about 10-30 seconds. To see more examples of this in action, you can explore the details of AI food photography.
A Clear Comparison
Let's break down how this new approach stacks up against the old way of doing things. It's not just about the money you save; it's about getting your time and creative freedom back.
Cost and Time Comparison: Traditional vs. AI Photo Processing
| Factor | Traditional Photography | MenuCapture AI Processing |
|---|---|---|
| Cost Per Photo | $75 - $150 | $0.24 (weekly) or $0.09 (annual) |
| Turnaround Time | 2 - 7 days | 10-30 seconds |
| Required Skill | High (or hire a pro) | Low (type simple text) |
| Flexibility | Low (scheduling needed) | High (on-demand 24/7) |
The numbers really speak for themselves. You're not just making a small improvement; you're fundamentally changing your workflow.
The Big Picture: Traditional photography costs $75-150 per photo with a 2-7 day turnaround. AI processing with MenuCapture costs as little as $0.09 per photo with a 30-second turnaround. Save 99.9% on menu photo costs while getting results in seconds instead of days.
This shift means you’re no longer stuck waiting on a photographer’s schedule to update your menu or promote a daily special. You can take a photo with your phone, type a few words, and have a professional image ready to post before the lunch rush even begins. That’s the kind of agility that lets you market your food in real-time.
Streamlining Your Photo Workflow
https://www.youtube.com/embed/cp4tvNigvUU
Getting a great shot is only half the battle. How you edit, organize, and use your photos is just as crucial. A clunky, slow process can eat up hours you don't have. For a busy restaurant, streamlining this workflow isn't just a nice-to-have; it's a must for staying agile and consistent.
You shouldn't need a graphic design degree just to tweak a photo for your menu. The right system gives you control, letting you update your visuals as fast as your specials change.
Edit, Refine, and Perfect Your Images
Once you've edited a photo, you shouldn't be locked into that one version forever. This is where continuous editing really shines. With a tool like MenuCapture, your edits are never set in stone. After you’ve made a sauce look a little glossier, you can take that new version and keep going.
The system saves a complete version history with thumbnails for every photo, giving you a visual trail of every tweak you've made. This freedom lets you experiment without fear. If you decide you liked a previous version better, it’s always just a click away. You can even use familiar keyboard shortcuts like Ctrl+Z (Undo) and Ctrl+Y (Redo) to step backward and forward through your changes instantly.
Keep Your Photos Organized Automatically
As you build a collection of menu photos, finding them again becomes a real challenge. Nothing is more frustrating than digging through unlabeled folders on your computer to find that one shot of your Tuesday burger special. It's a massive time-waster.
A smart gallery system handles the tedious organization for you. As you work on your images, they’re automatically saved into an organized gallery. The system uses smart grouping by date and provides search functionality, making everything easy to find later.
Your time is best spent in the kitchen, not hunting for files. An automated gallery means the right photo is always just a few seconds away, ready to go on your menu, website, or Instagram.
Accelerate Your Workflow with Advanced Tools
When you need to update a whole section of your menu, doing things one by one is a drag. This is where batch processing comes in handy, letting you apply the same changes to up to 10 photos at once. It's a game-changer for updating seasonal menus or giving an entire category a quick refresh.
You also get a ton of creative control without the complexity. Need to swap out the background? You can instantly place your dish on countless surfaces: from rustic wood tables to clean marble countertops or even an industrial concrete setting. This helps ensure every photo perfectly matches your restaurant's brand.
Got Questions? We’ve Got Answers.
When restaurant owners start thinking about DIY food photography, the same questions tend to pop up. Let's clear the air and tackle some of the most common concerns we hear every day.
Do I Really Need a Fancy Camera?
Honestly? No, you really don't. The camera you have in your pocket right now—your smartphone—is a powerhouse. Modern phone cameras are more than capable of capturing high-quality images for your menu.
It’s less about the gear and more about the technique. A well-lit, thoughtfully composed photo taken on a phone is a fantastic starting point. The magic is in the setup and the light, not in spending a fortune on a bulky camera.
What’s the Secret to Perfect Lighting?
The best light for making food look incredible is almost always natural daylight. Find a spot next to a window, and you've found your perfect studio. This soft, diffused light wraps around the food, creating gentle shadows that give it depth and make it look fresh and appetizing.
The one thing to always avoid? Your camera's built-in flash. It's the fastest way to make delicious food look flat, greasy, and just plain unappealing. Direct, harsh sunlight is another one to skip, as it creates strong, distracting shadows. Window light is your best friend.
Will AI Editing Make My Food Look Fake?
That’s a fair question. The short answer is no, not when you're using the right kind of tool. There's a world of difference between AI that generates a fake image from thin air and a tool designed to edit a photo you actually took of your own food.
Think of it as a photo assistant, not an artist. A tool like MenuCapture starts with your photo of your dish. You then guide it with simple text prompts like "make the sauce glisten" or "add a side of fries." The result is a polished, professional version of the real thing, not some computer-generated fantasy. It’s still your food, just looking its absolute best.
What’s the Real Cost of Professional Food Photography?
Hiring a pro isn't cheap. You’re typically looking at a bill of $75 to $150 per finished photo. For a full menu or regular specials, that number can balloon into the thousands very quickly.
And that's just the financial cost. You also have to factor in the time for scheduling the shoot and the typical 2-7 day turnaround to get your photos back. In comparison, AI photo processing with MenuCapture is available for $9/week or $159/year. That means you can shoot a new special and have a gorgeous photo on your online menu before the lunch rush even starts.
At MenuCapture, we help you create mouth-watering menu photos in seconds, not days. Forget spending a fortune on photographers and waiting around for edits. It's time to take control of your menu's visuals with simple text commands.
Ready to transform your menu photos?
Type what you want changed and AI processes your restaurant photos in seconds.
Start Processing Photos